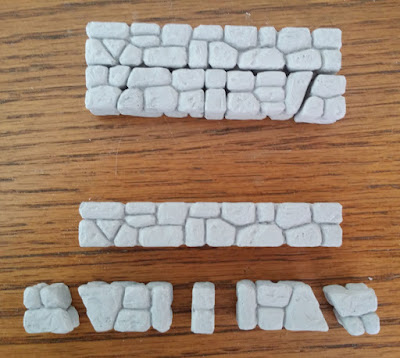
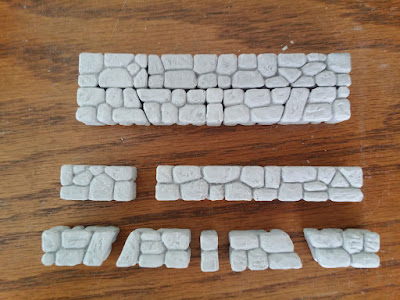
I own quite a few hirst arts molds, and have come up with a helpful tips.
1) Fieldstone Walls
If you are working on a project with a looming deadline, and need lots of fieldstone walls cast yesterday, you can use other molds to make blocks beyond the basic fieldstone mold.
a) You can use the blocks from the flagstone floor mold glued back to back to make a 1"x1"x1/2" block. Yes it looks noticeably different from a fieldstone wall, but if you are working on a project with a "basement area" this will work well for the lower portion. Also it makes for a wall with a completely flat top due to the scrapped side being sandwiched inside the blocks (no irregular block heights).
b) You can use the fieldstone rubble mold to make blocks. It takes two castings to get complete blocks, but every little bit helps if you're on a deadline.
c) If you have the Octagon tower mold, you can use the straight sections to make long blocks.
The long/short angle sections along with a 1/4" block make a 3" long wall section (3" wall block shown on the top).

Two long angled sections along with a 1/4" block will make a 4" long wall section (1" + 3" wall shown on the top).
2) Waste Nothing
I put a plastic trash bag down over my table when I cast. This catches all the plaster that gets scrapped off. All the plaster bits and dust go into this plastic bowl (I also unmold my blocks over top of it). I break up the pieces and then I can add them to large blocks when I cast them. I usually use this for large molds like the cavern mold and the space corridor edging mold. I fill the molds about half way with plaster, and then add the dry scraps to the blocks. Then I cover them with more plaster to top off the molds.
This is a picture of some holders that I use when painting miniatures. They are soda bottle caps so they already have a nice texture to the edges (these really help with hand fatigue). I fill them about halfway with scrap plaster, and add water. Then when I scrap my molds, I can drop the excess on top of these and scrap them off flat.
Some bottle caps in progress.
After these dry, I run them over some sandpaper to make sure they are smooth. Then I put two coats of high gloss varnish on them, and they are ready to have some minis stuck on them with some poster tack.


No comments:
Post a Comment