Monday, August 29, 2016

Hobby Tools that I Love

1) Master's Brush Soap - One of the best brush soaps I've used. I have this in several sizes from travel up to a 42 oz tub. The best part is that you can leave it on the bristles as a conditioner.

2) The Color Scheme Bible - I find this very helpful for coming up with color schemes especially for single fantasy miniatures. The book is divided up by main color sections. Then you pick a hue from that section (The picture on the right is Sunshine from the yellow section). On the same page it has "accent" colors  and "highlight" colors (book specific terms). To me this is the best part because the accent and highlight colors are not always ones that I would pick out just using a color wheel. Using this page for reference, the accent colors are a different hue of the main color (paler yellow) and a triadic color (dark rose), and the highlight colors are a tint of a triadic color (light blue) and a split complementary (navy).

3) Martha Stewart 1" Circle Punch - I have a paint palette that consists of six 1" wells. I use this punch to cut circles out of parchment paper and paper towels and then I have an instant wet palette.

4) Condiment Cups - I collect these from fast food restaurants (I believe the ones pictured came from Wendy's). They are great for mixing large amounts of paint for batch painting or terrain. If I need to stop painting for a little while I add some retarder and cover the tops with aluminum foil.

5) Badger Paint Mixer -Saving old paint one pot at a time.

6) Paint Swatch Flip Book - This is a Piccadilly brand sketch book that I picked up at Barnes & Nobles. I use a template to draw circles on the page and fill a circle with each paint color I own. This lets me see the color of each paint when it is dry. I have the pages divided up by main color, pinks, reds, oranges, yellows, etc.  The spiral binding is helpful because when the color sections start to fill up, I can pull apart the book and rearrange the pages. I use this a lot when picking out colors schemes or trying to match already painted models. 

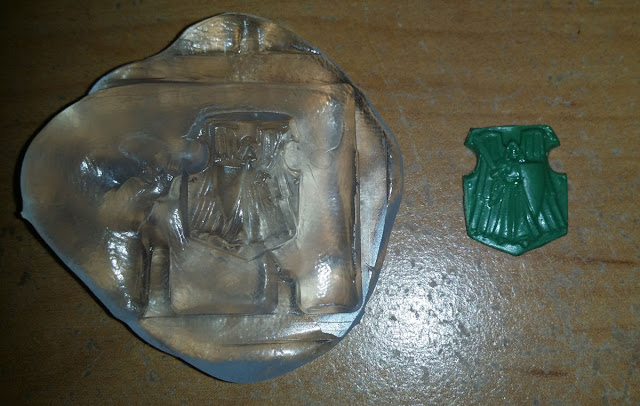
 7) Instant Mold - This is a great product for duplicating / repairing parts on miniatures.I used this to replace a missing shield for an old Deathwing Captain miniature.

8) Sculpting Tools - I've collected these from a variety of places. The six on the left are old/broken dental tools that I got from a dental hygienist friend. The red handled tool is a clay sculpting tool from a ceramic store. The next three with wooden handles are embossing tools from a big box craft tool. The red paintbrush tool is an old brush the bristles fell out of that I used green stuff to wedge a pin in the ferrule.The three black handled tools are clay shapers from an art supply store. The next four are from a miniature sculpting tool set, but I don't remember what brand they are. The last one is a paint mixer that I've gotten from Amazon.

The tools I use the most are the far left dental tool with the really sharp point, the flat ended clay shaper, the metal sculpting tool with the end that is flat on one side and beveled on the other (fifth from the right) and the little spoon end on the paint mixer.


Honorable Mention: I cant really say that I love this tool, but I use it all the time. While it has some good points it also has some harsh drawbacks.

Citadel Fine Detail Cutters - These were not a bargain; I feel that they were more expensive than they should be. The clipping action is really smooth, and the spring is hidden in the "pivot join" (I don't know the proper word for that part). Before getting this pair of clippers I had a rubber coated yellow handled pair with an exposed spring that would pinch me if I was not careful (small hands..sigh) so I really appreciated that the spring is enclosed. The picture on the right is what happens when you try to clip paperclips or metal wire with the Citadel clippers. They are far too soft to use on such metals so I would only use them for plastic and finecast.

Friday, August 26, 2016

Basket Weave Tutorial

This vase miniature is a Hirst arts block from the Common Inn Accessory mold #58, but you could use this technique on any round or squared shape. I painted this piece to be a woven laundry basket for a little vignette I'm making to display some fantasy miniatures. So I added a sock hanging down the side, and some more fabric inside made out of green stuff.

1) Start by base coating the pot a medium brown color (Games Workshop: Graveyard Earth / current color = P3: Gun Corps Brown). Using a tan color (Games Workshop: Kommando Khaki / current color = P3: Hammerfall Khaki) paint lines on the bottom in a wheel pattern.


2) Continue the tan lines up the sides of the pot. You may need to add more lines to fill in the sides just be sure to add an even number of vertical spokes.

3) Using the tan color paint one horizontal line across the middle of the pot.

4) Using a dark brown color (Citadel: Rhinox Hide) paint a thin line along the bottom and right side of the horizontal line. You will be painting over one of the vertical spokes.

5)  I don't have a picture of this step because I didn't realize it was blurry.  You will be using a light tan color (Games Workshop: Bleached Bone / current color = Citadel: Flayed One Flesh) to paint a thin line along the top and left side of the horizontal edge.

6) When you have finished the middle horizontal line, Paint another horizontal line
 above and below the first. Highlight and shadow these lines like the first, but offset by one spoke.

7) Continue this pattern towards the top and bottom of the pot. Be mindful that the pattern will wrap inside the pot, and that you will need to reverse the direction of the highlights and shadows on the inside.

8) After finishing the pattern, apply a coat of a sepia colored wash (Army Painter Soft Tone) to shade the basket. Focus the wash more towards the bottom and inside of the basket.

Monday, August 22, 2016

Space Hulk Set - Casting Finshed

I finally finished casting my Hirst Arts Space Hulk set. Here are all the pieces primed. I'm still deciding on the paint scheme. I want to do the flooring in steel, but I don't know if the edging would look better in blue or brass.


Saturday, August 20, 2016

PotM August 2016: Dalek Skirt

August 2016 Project of the Month

I made this skirt for my Halloween costume last year, and ran out of time so I had to wear it before I could finish the hand sewing on the inside. Of course since the event I made it for was over, it sat on top of the to-be-finished pile. I took it with me to game night this week and finally finished sewing the yoke lining. I keep toying with the idea that I should paint black vents on the grey section, but for now I'm calling this finished.

Monday, August 15, 2016

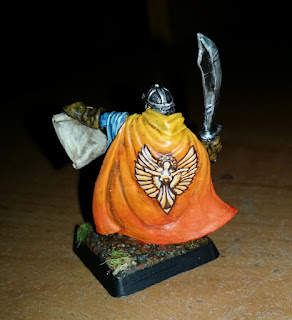
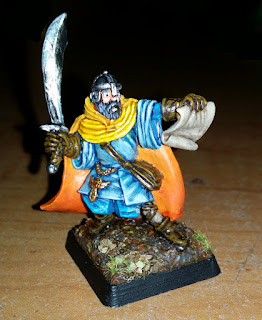
Cleric of Sarenrae Miniature

This is a miniature I converted and painted for my husband. The mini is a reaper figure #02401: Thomas Bronwyn, and he was originally holding a hammer with a cross dangling on his hip.

Cleric of Sarenrae by KnitfinkCleric of Sarenrae by Knitfink


Before painting.I replaced the hammer, and added a Sarenrae icon.
Cleric of Sarenrae by Knitfink

Monday, August 8, 2016

Chaos Objective Markers

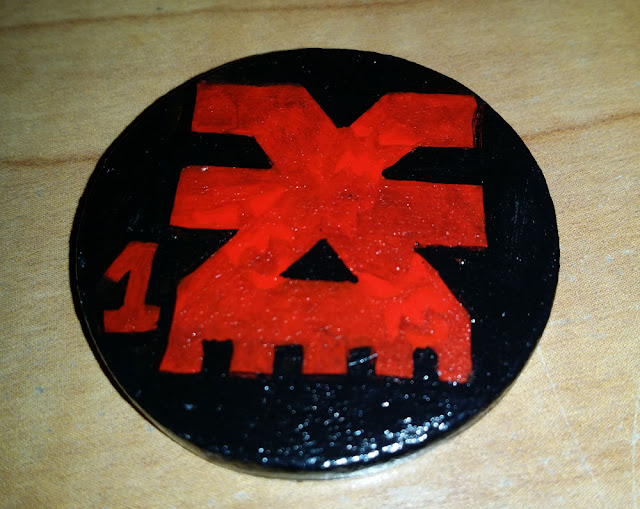
These Khorne objective markers are made from wooden nickels
Khorne Objective markers by Knitfink
Closeup to see the mini faces in the Khorne symbol.
Khorne Objective markers by Knitfink
The back of the Khorne objective markers.
Khorne Objective markers by Knitfink

Nurgle objective markers front.
Nurgle Objective markers by Knitfink
Nurgle objective markers back.
Nurgle Objective markers by Knitfink

Monday, August 1, 2016

Deathwing Captain Shield

I have a set of original metal deathwing terminators, but somewhere over 20+ years the captain's shield got lost. I used insta-mold to make a new one by casting a bit from the dark angel veteran sprue. The original shield was triangular, but I think this one matches well enough.
Instamold used to make a DA Deathwing shield by Knitfink

The finished mini.
Instamold used to make a DA Deathwing shield by Knitfink